How to Create a Word Template with Placeholders
In today’s fast-paced B2B environment, copying and pasting data from spreadsheets into Microsoft Word documents is a massive bottleneck. Creating a word template with placeholders is the key to unlocking automated document generation. By replacing static text with dynamic variable tags, you can instantly generate contracts, invoices, certificates, and employee offer letters in bulk.
This comprehensive guide walks you through the step-by-step process of designing, formatting, and automating a Word template with placeholders. We will cover correct syntax, styling best practices, conditional logic, and how to use modern automation engines like TRYDOKU to turn your static template into hundreds of personalized files in seconds.
What is a Word Template with Placeholders?
A word template with placeholders is a standard Microsoft Word document (in .docx format) that contains specific, easily identifiable text tags representing variable data fields. Instead of hardcoding a customer's name, contract price, or address, you write a placeholder tag.
When processed by a document generation engine, these placeholder tags are dynamically replaced with actual records from a database, Excel sheet, Google Sheet, or JSON payload. The rest of the document's structure, styling, and formatting remains identical.
Why Choose Double Curly Braces (Mustache Syntax)?
Historically, Microsoft Word users relied on "Mail Merge Fields" to achieve automation. However, native mail merge fields are hidden behind complex menus, require toggling field codes (Alt+F9), and frequently break when templates are edited.
Modern document generation platforms like TRYDOKU use standard double curly braces syntax: {{placeholder_name}}. This is often referred to as Mustache or Handlebars syntax. It has several distinct advantages:
- Readability: You can see the placeholders directly on the page without toggling special modes.
- Editability: You can edit, copy, paste, and delete placeholders just like regular text.
- Compatibility: It works across all versions of Microsoft Word, Google Docs, and LibreOffice.
- Multi-platform: It maps cleanly to web forms, CSV headers, and JSON API payloads.
Step-by-Step: Creating a Word Template with Placeholders
Step 1: Define Your Data Structure
Before opening Microsoft Word, define the variables your document needs. For example, if you are automating an employment contract, write down the data points that change for every new employee:
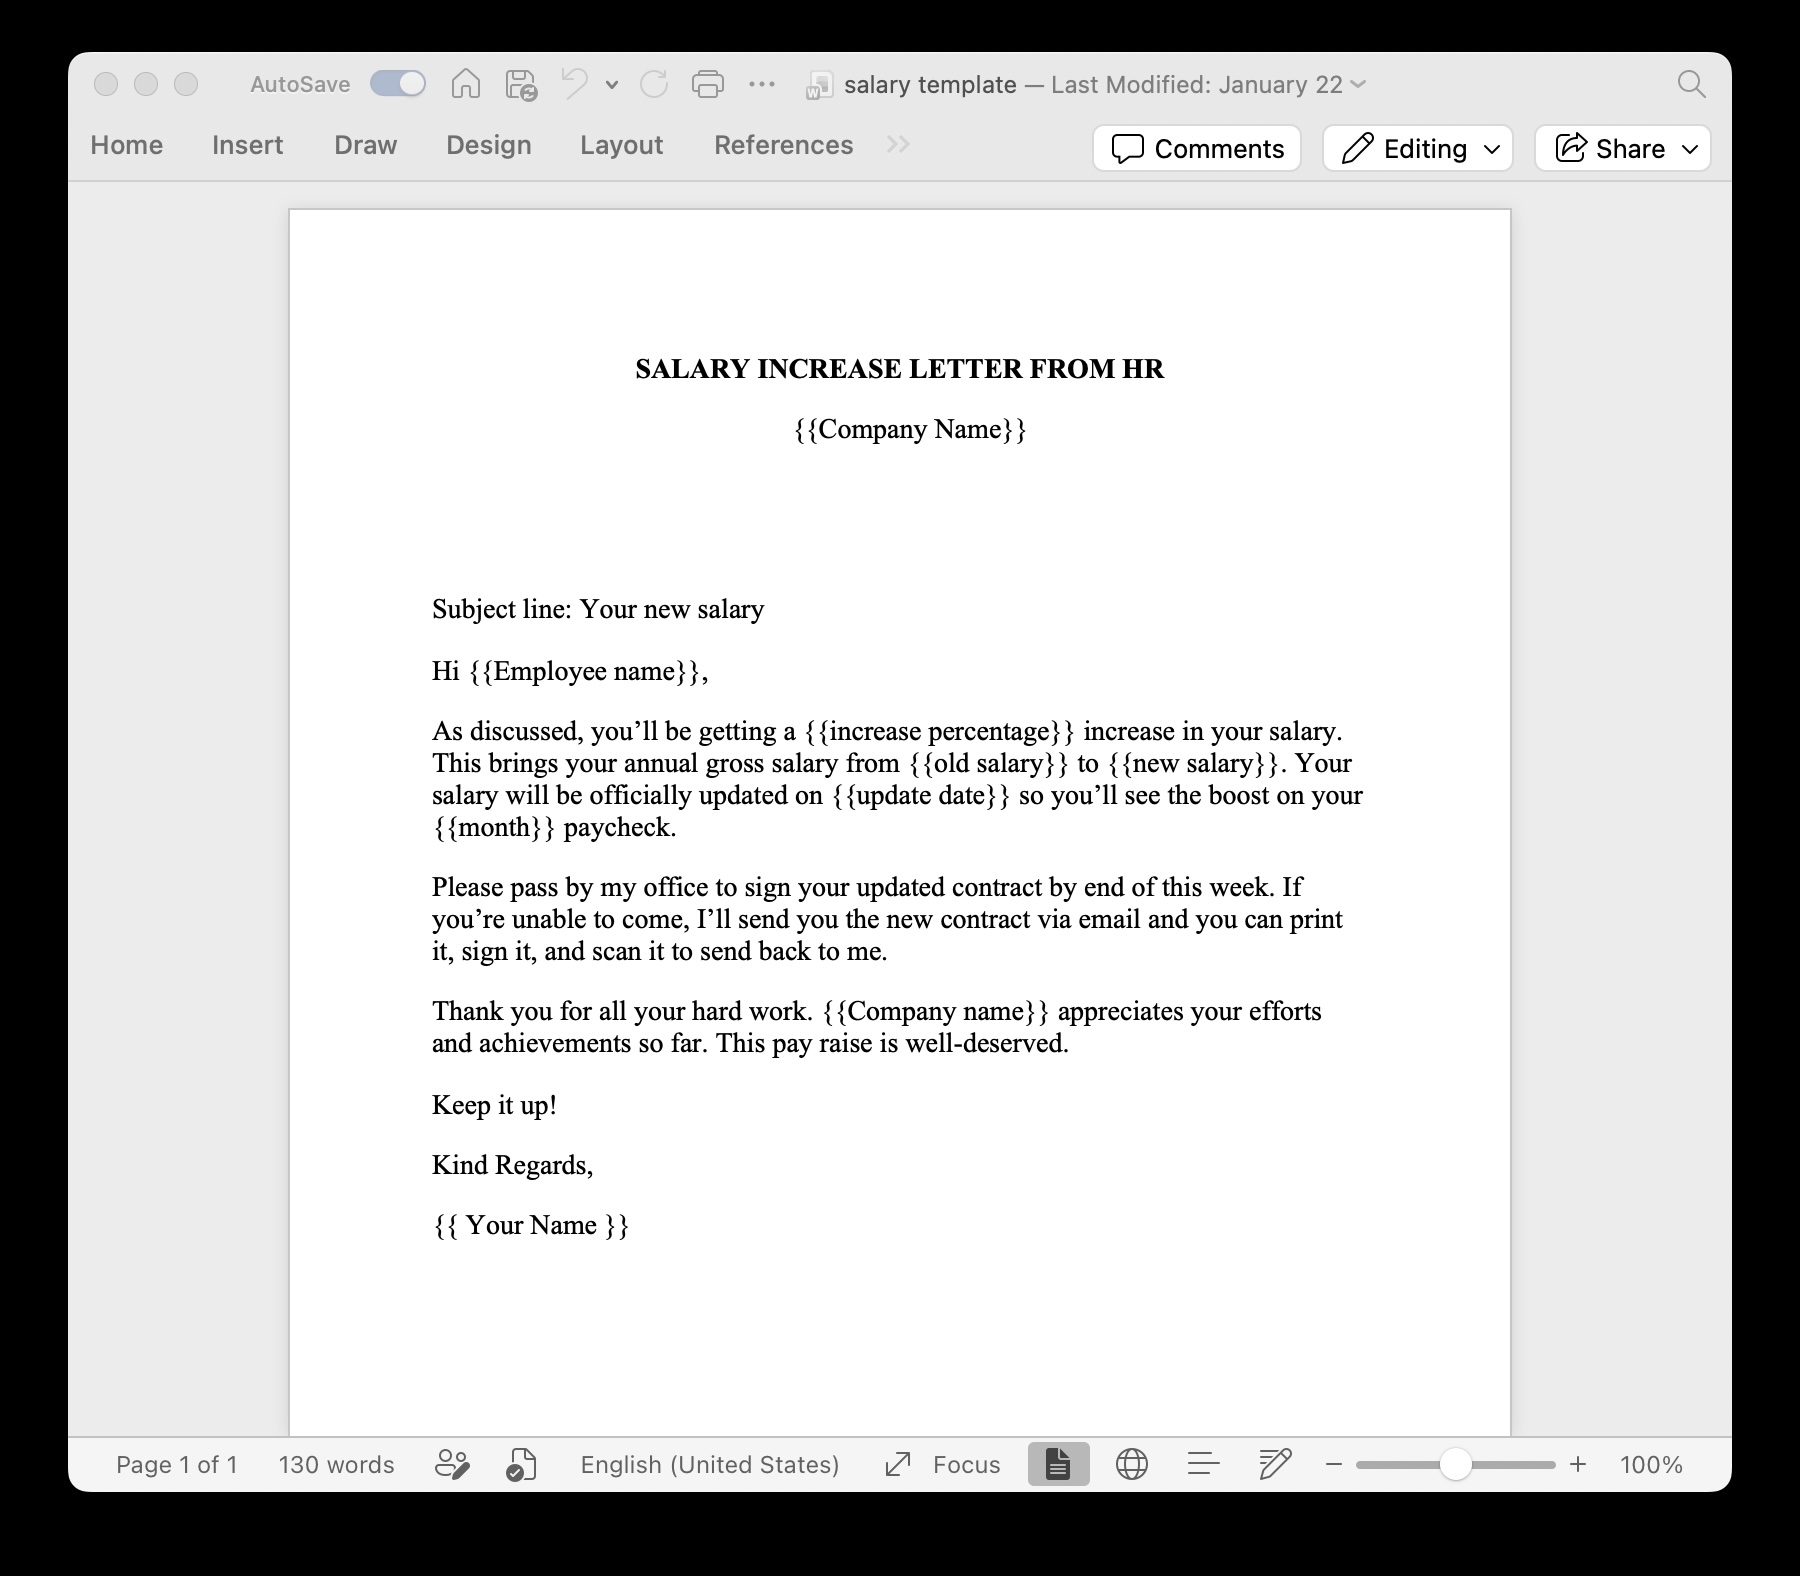
{{employee_name}}{{job_title}}{{salary}}{{start_date}}
Keep your placeholder names simple, using alphanumeric characters and underscores (no spaces or special characters).
Step 2: Type Placeholders in Word
Open Microsoft Word and write your document. Wherever a dynamic data point is needed, type your variable surrounded by double curly braces.
This Employment Agreement (the "Agreement") is entered into as of {{contract_date}} by and between TRYDOKU Ltd. ("Employer") and {{employee_name}} ("Employee").Crucial Tip: Ensure that the closing braces match the opening braces exactly. A typo like {{employee_name} (missing brace) will cause the parser to ignore the variable.
Step 3: Format Your Placeholders
One of the best features of double curly brace placeholders is that they inherit whatever formatting is applied to them. If you want the employee's name to be bold, underlined, and blue, simply apply those styles to the placeholder tag in Word:
We will render: {{employee_name}}.
When the document generator populates the template, the final text ("John Doe") will be generated with the exact same bold, underlined, and blue font.
Step 4: Save the Template as .docx
Go to File → Save As and select Word Document (.docx). Document automation engines rely on the underlying XML structure of .docx files. Do not save your file as .doc, .rtf, or .pdf.
Advanced Placeholder Techniques
Simple text replacement is fine for basic letters, but complex documents often require repeating tables, loops, and conditional formatting.
1. Creating Repeating Tables (Loops)
If you need to generate an invoice with multiple line items (e.g. description, quantity, price), you must repeat a row in a table. In TRYDOKU, this is achieved using block tags.
Start the repeating section with {{#items}} and close it with {{/items}}. The row between these tags will be duplicated for every item in your data array:
| Description | Qty | Price |
|---|---|---|
| {{#items}}{{description}} | {{quantity}} | {{price}}{{/items}} |
To learn more about repeating rows programmatically, check out our guide on Introducing Dynamic Loops in Word Templates.
2. Conditional Sections (If/Else logic)
Sometimes parts of a contract should only appear under certain conditions. For example, a probationary period clause should only render if probation is true:
{{#has_probation}}The employee shall undergo a probationary period of three (3) months.{{/has_probation}}If the data contains "has_probation": true, the paragraph appears. If it is false or missing, the entire block is omitted automatically, removing any empty space.
Best Practices for Word Template Design
To prevent generation errors and ensure beautiful layouts, adhere to these guidelines:
- Watch for hidden XML tags: If you edit a placeholder in Word (e.g., typing
{{employee, pausing, changing formatting, then typing_name}}), Word might insert hidden formatting XML tags inside the placeholder. This breaks the text string for the parser. To fix this, highlight the placeholder, clear formatting, and re-type it. - Keep styles consistent: Apply style rules to the entire placeholder including the curly braces. Do not apply a bold style to only the text inside and leave the braces normal.
- Avoid special characters: Stick to letters, numbers, and underscores (e.g.,
{{invoice_total_2026}}). Do not use spaces, hyphens, or currency signs inside variables. - Set table constraints: When using repeating tables, set explicit column widths in Word to prevent table columns from jumping sizes based on long text strings.
How to Automate Your Word Template
Once your template is ready, you can generate documents using TRYDOKU in three simple steps:
1. Upload Template
Upload your .docx file to TRYDOKU. The system automatically extracts all placeholders.
2. Connect Data Source
Upload your Excel sheet (.xlsx) or CSV file. Each row represents one output document.
3. Generate & Download
Map your sheet columns to the placeholders, then click Generate. Download your files individually or as a ZIP.
If you are moving away from traditional Word workflows and need a comparison of methods, take a look at our Mail Merge Alternatives Guide.
Ready to automate your document templates?
Upload your Word document with placeholders, import Excel data, and download completed PDFs instantly.
Try TRYDOKU for FreeFrequently Asked Questions
Can I generate PDF documents from my Word template?
Yes. When automating templates with TRYDOKU, you can choose to output the finalized documents in either Microsoft Word (.docx) or Adobe PDF (.pdf) format, preserving all original fonts and styles.
What happens if a placeholder is missing from my Excel sheet?
If your spreadsheet does not have a column for a specific placeholder, TRYDOKU will replace it with empty text by default, preventing raw curly braces from showing in the finished document.
Do placeholders support images?
Yes, advanced document engines support image placeholders using specific syntax, letting you dynamically insert logos, profile photos, or signatures into predefined boxes.
How many documents can I generate at once?
With TRYDOKU, you can automate thousands of documents simultaneously. Simply upload your template and a spreadsheet with as many rows as needed to generate a bulk ZIP archive in seconds.